Frontend fields
With the PubyDoc Data Table and Charts plugin, you can create and customize fully editable data tables. Your external users can view, edit, delete data, upload files, and save those changes to a spreadsheet. For example, own orders or requests, own items added to the warehouse, etc.
This is a standard plugin option, and in this tutorial, you will learn more about front-end editable fields.
Create Table
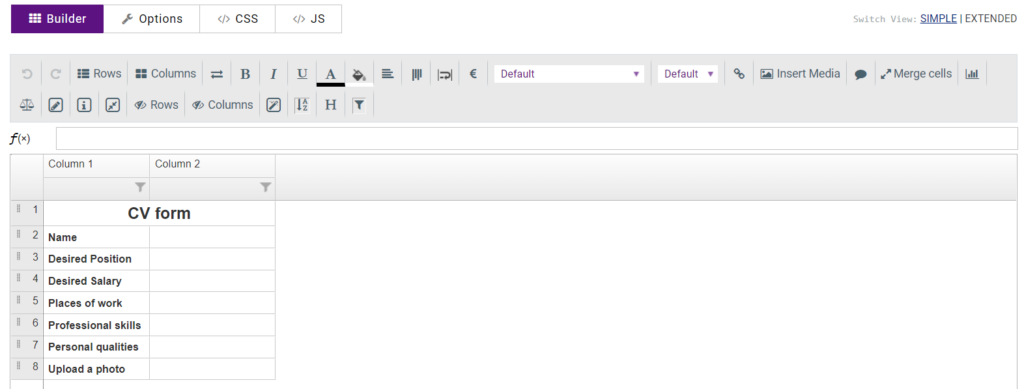
For ease of understanding, we will do everything on a specific example. For example, let’s create an editable table with a form for an employee’s CV.
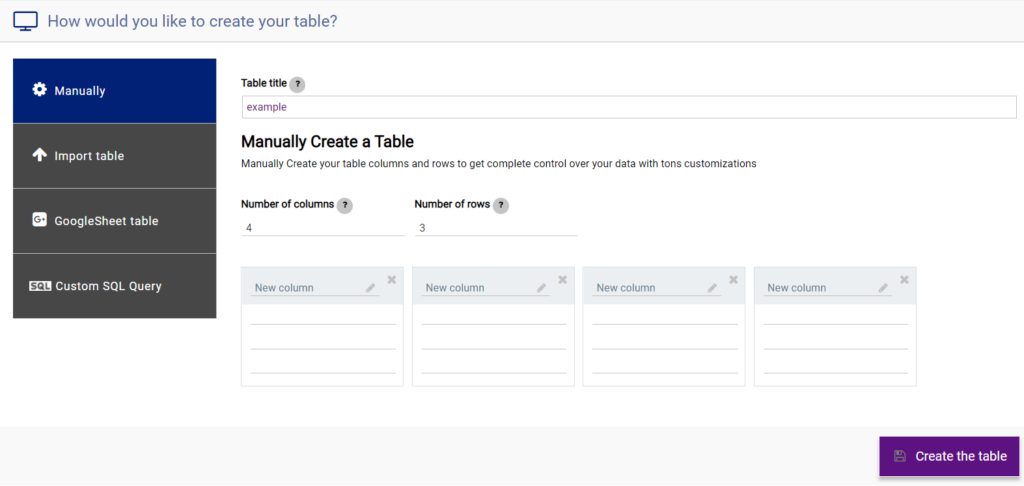
First, we need to open the WordPress admin panel, go to the PubyDoc DataTable plugin -> Add Table, select the “Create Table Manually” or “Import” option, and click “Create“.

Then we need to complete the table. In our example CV, we added the first column with the names of the fields: name, desired position, desired salary, places of work, your professional skills, your personal qualities, upload a photo. The second column will be empty for the user to fill in.

Since in our CV form example, all the cells in this example will have a different data type, let’s put each of the cells in the appropriate type. For this we use the Cell Formatting option, check out this article for more details.
Editable Cells
Now we need to make the cells editable on the front. You can make editable:
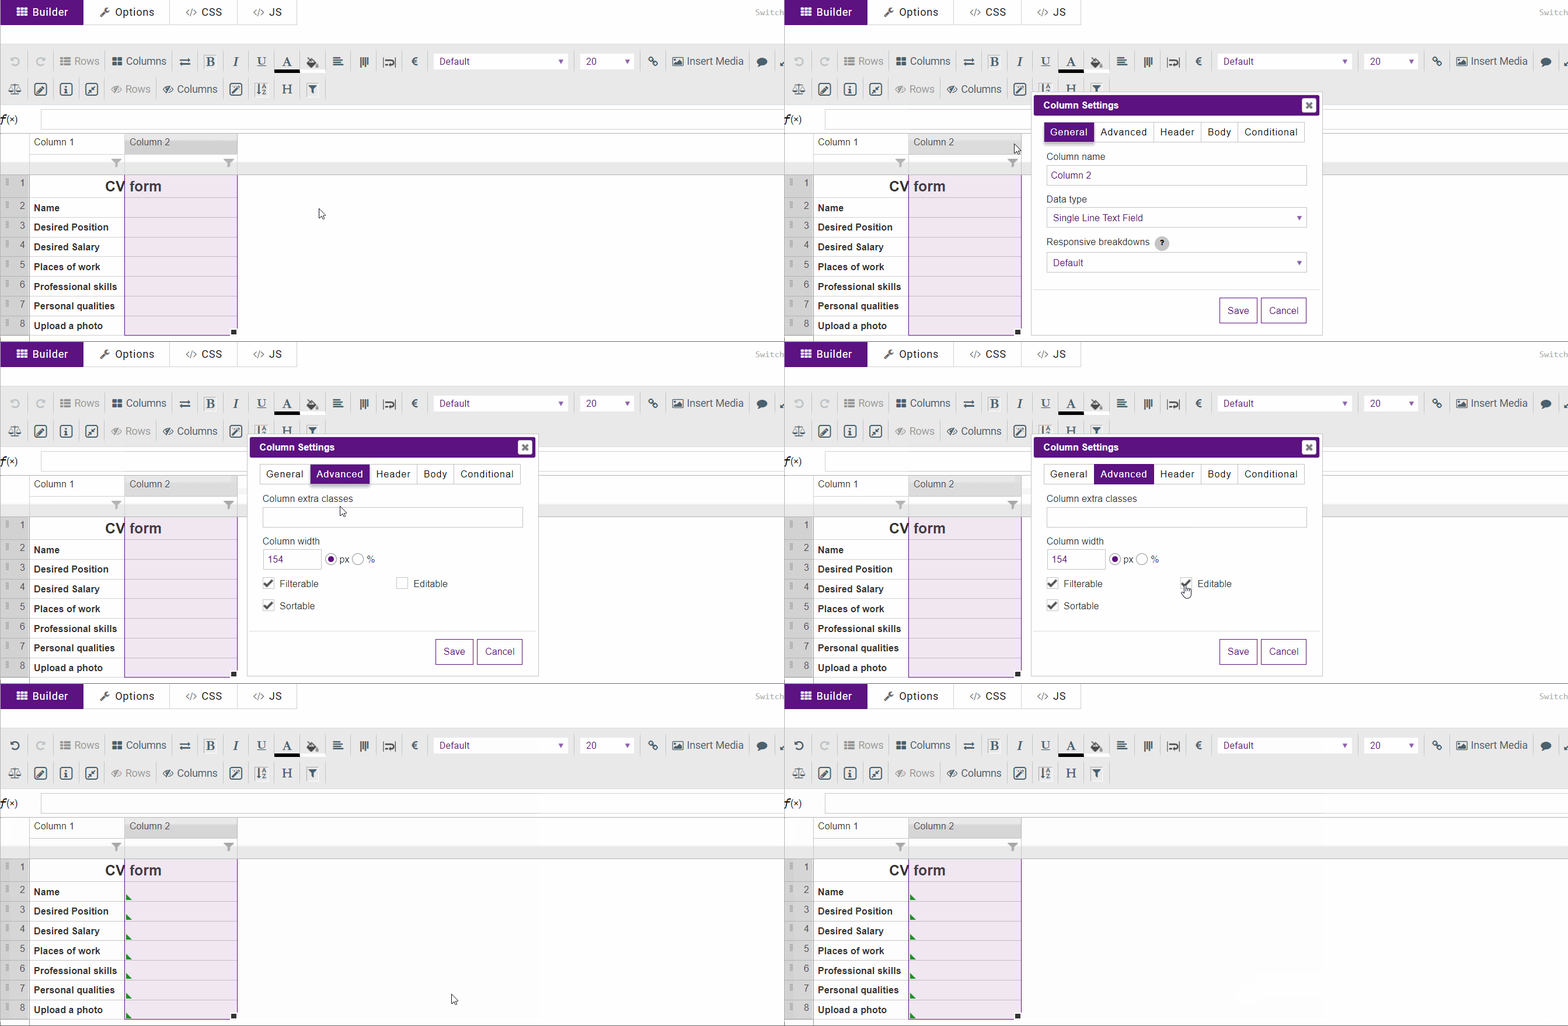
- Column. Go to column settings->Advanced-> and check the Editable checkbox. Now column cells can be edited on the front.

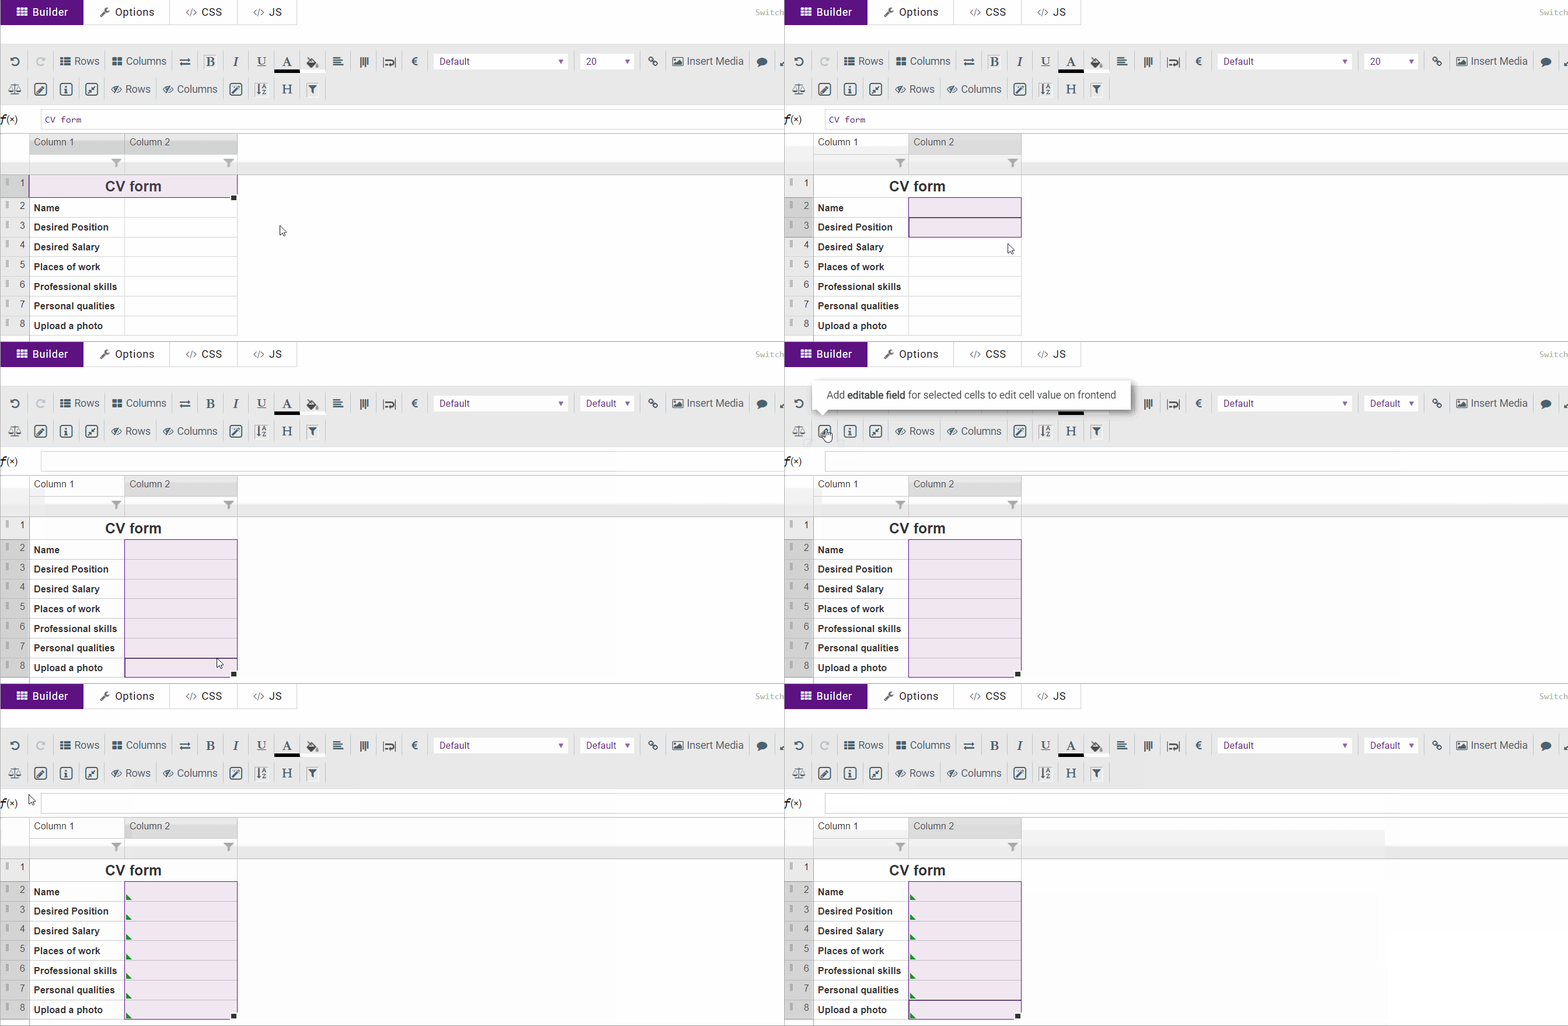
- A cell, or a range of cells. To do this, enable the Extended builder, select the required cells and enable the Add editable field option. Cells can now be edited on the front end.

To remove editable fields from cells, do everything in reverse order: select the cell, or click on the Add editable field option and click on the trash icon.
Setting Frontend fields
Now that we have enabled the Editable option on the cells we need, let’s move on to set up their editing on the front. To do this, open options->frontend fields.

Here you can set the following options:
- Save fronted fields. If this option is enabled, then the edited table data on the front will be saved in the table.
- Mark last edited cell. If this option is enabled, then the last edited field on the front will be marked with a checkmark.
- Use for logged-in users only. Allows to use frontend fields only for logged in users, if the option is enabled then you can configure:
- Use for current roles only. Select a specific user role or several, that can edit fields in the table.
- Allow these file extensions. If the table has fields for uploading files, then you can choose which formats can be uploaded.
This way you can fully customize the editable frontend fields to suit your needs. Add tables to pages, and your users can fill them out.
Example
In our example, we have such a form for filling out a CV by an employee:
| Column 1 | Column 2 |
|---|---|
| CV form | |
| Name | |
| Desired Position | |
| Desired Salary (year) | |
| Places of work | |
| Professional skills | |
| Personal qualities | |
| Upload a photo | |