Pagination
Pagination is the functionality that divides a large array of data available into separate pages for ease of use.
Data Tables plugin has built-in functionality that allows navigating through the content of a table. The plugin also provides an opportunity to split the content into a single page, or multiple pages. Let’s dive deeper into the pagination functionality.
Getting started
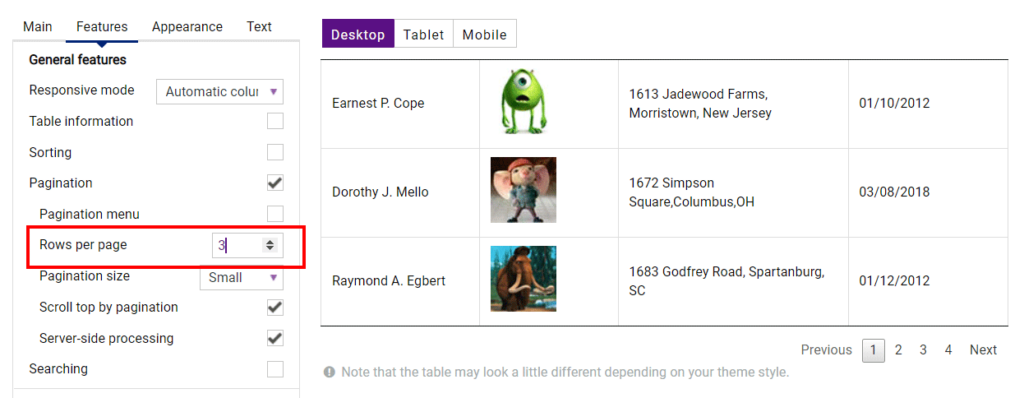
While you are on the Options settings page, scroll down to the General features section and check the Pagination box.
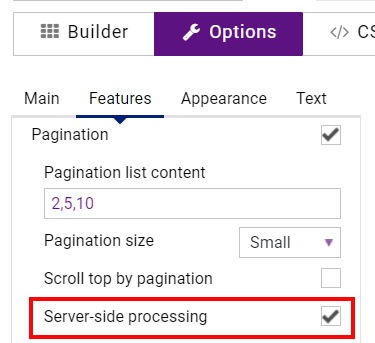
After you turned on the checkbox, you’ll get the additional pagination options to work with.
Check the Pagination menu box to show the drop-down list to select the number of rows on the page.
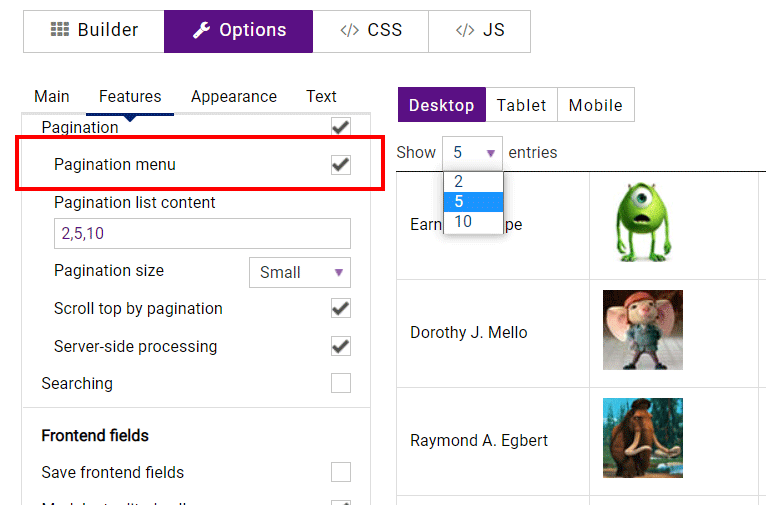
If the option is disabled, the number of posts per pagination can be regulated in the Rows per page numeric field.
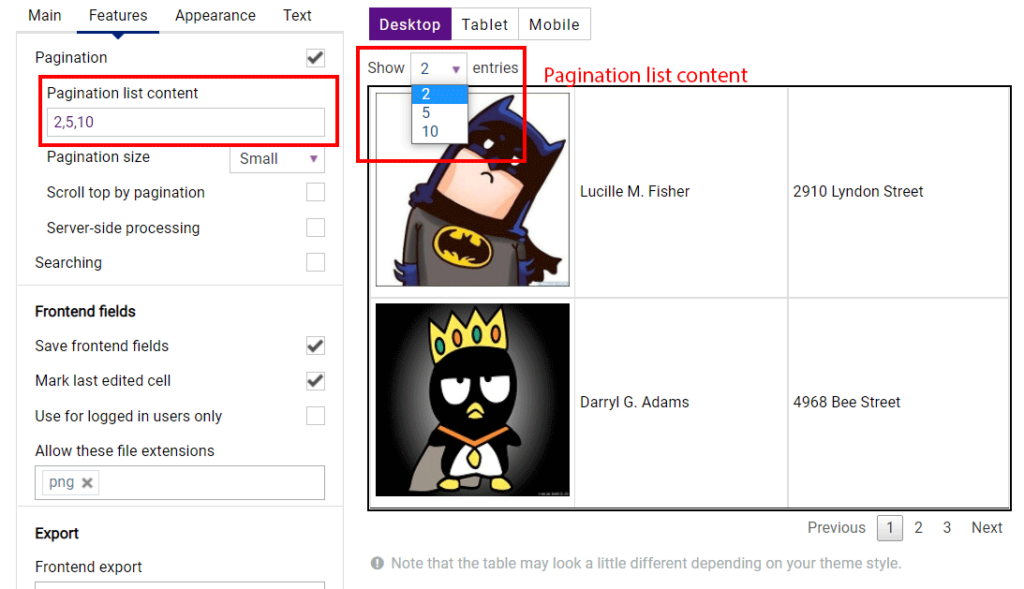
Pagination list content – set the number of rows to display on one pagination page. Establish several numbers separated by a comma to let users choose it personally. The first number will be displayed by default. Since that the number of Pagination Pages will be recounted also.
Pagination size – select the size of the numbered navigation. There are small, medium, and large types.
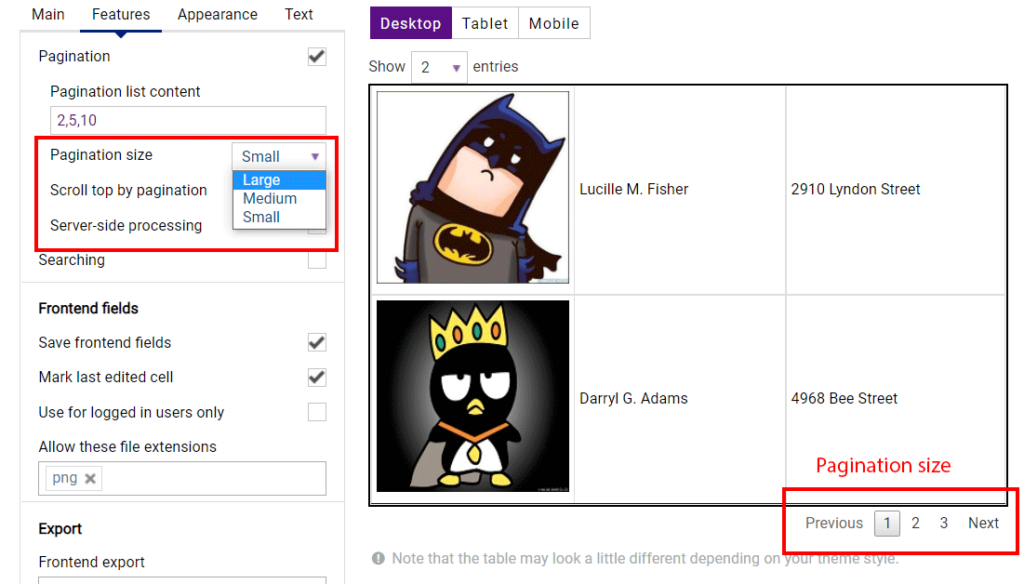
Scroll top by pagination – enable this option if you want a page to be scrolled up every time a user switches the pages.
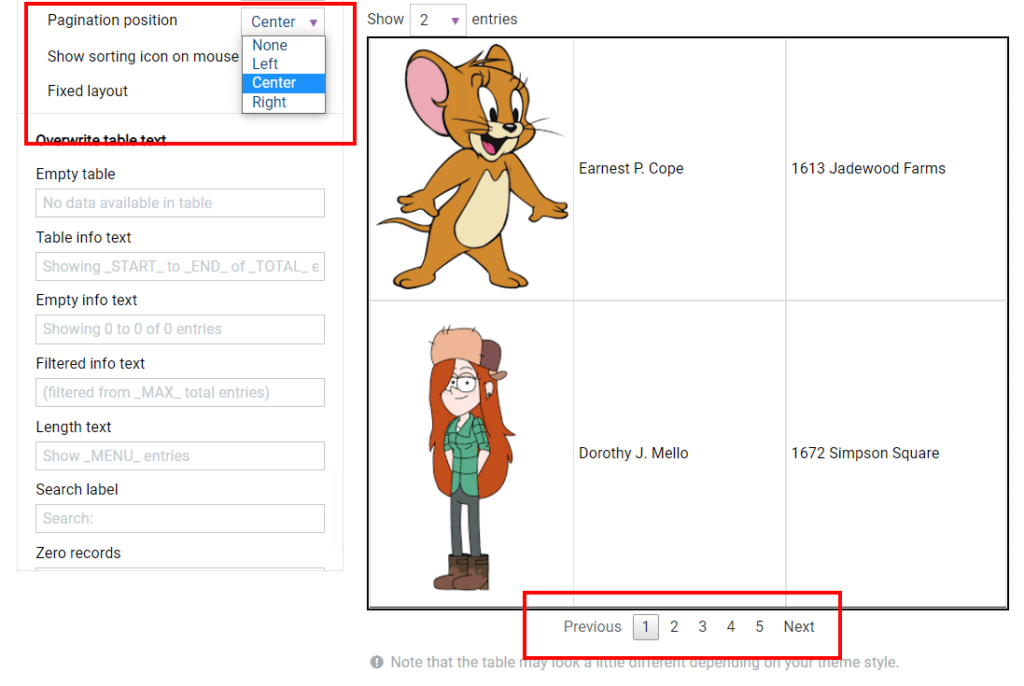
If you need to relocate the pagination scroll down to the Table styling section.
Additional settings
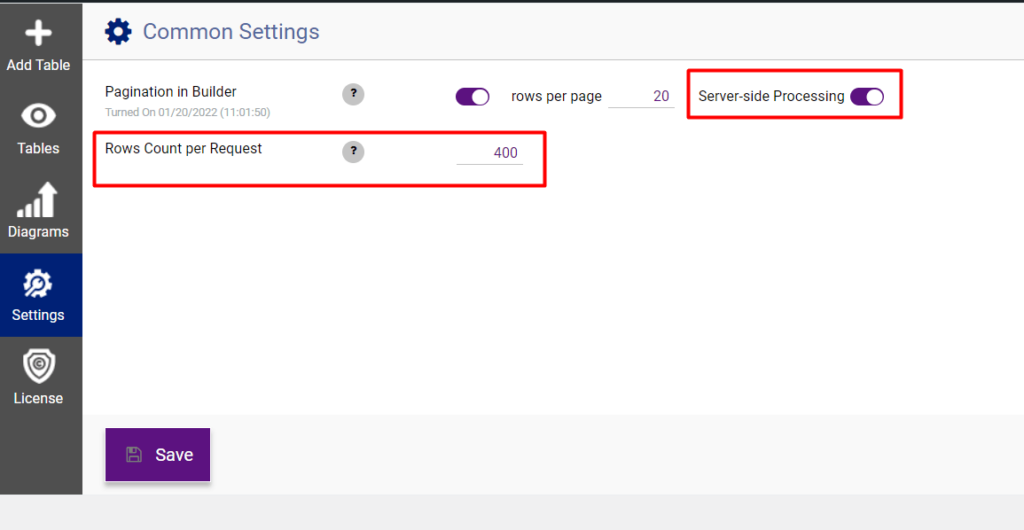
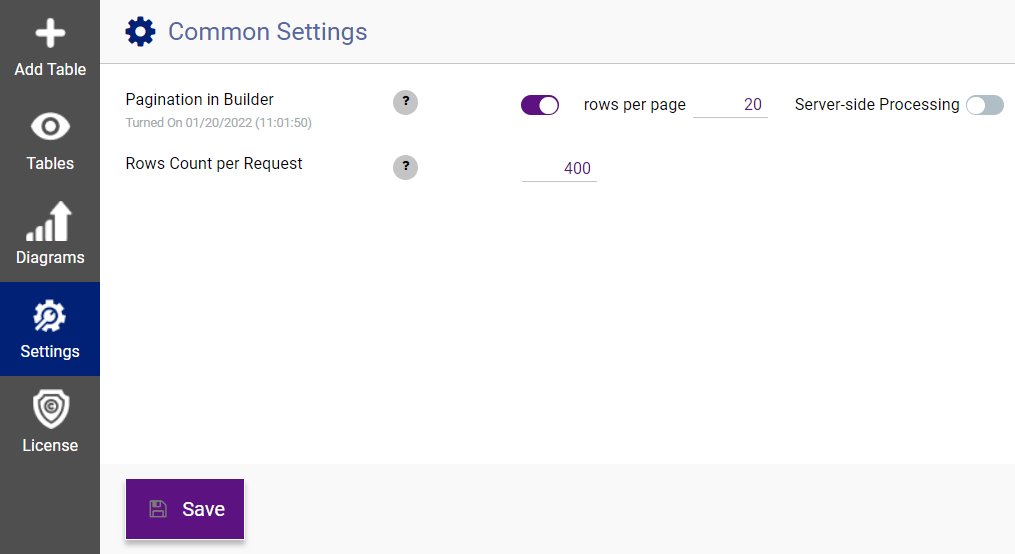
Click the Settings gear icon while in the plugins dashboard to get a few other opportunities to manage pagination. Here you can enable/disable pagination for all existing tables, set the rows per page, or turn on the Server-side Processing option.
Server-side processing
Server-side processing – this option is recommended for large tables that cannot be processed in a conventional way. The table will be sequentially loaded by ajax on a per-page basis, all filtering, ordering, and search clauses are server-side implemented too. You can enable this option either in the Options setting or in the Settings dashboard.
While in the Settings dashboard you may notice Rows Count per Request option.
Set the count of table rows in the Rows Count per Request text field, which will be put into the one saving request. If your table has more rows – as many requests will be sent as needed to completely save all table data. It can be useful if you have a large table and can not improve your server settings to save the table per a single request. If you do not have problems with the saving of tables it is better to leave the default value – 400.